

This is an automated archive made by the Lemmit Bot.
The original was posted on /r/simracing by /u/Dull-Tomatillo-7690 on 2023-09-08 01:35:39.
Hello, I’ve bought the SimJack Pro pedals and since they arrived, and before mounting them on the cockpit, I knew I didn’t like the brake resistance it had. So I made my own brake mod with some trial and error, and I will keep looking for alternatives. I will explain it here as I’d like to find everything: full detailed guide for dummies like me.
DISCLAIMER: althought I’m testing this on the SimJack Pros (SJP from now on), I’m pretty sure you can use this with Simsonn and Ruito pedals, and all those Aliexpress pedals sets that are based on the Heusinkveld pedals.
I’m also quite sure you can also use this with the SimJack Minis, but you would have to reduce the final size by removing elastomers/bushings/washers.
Let’s go:
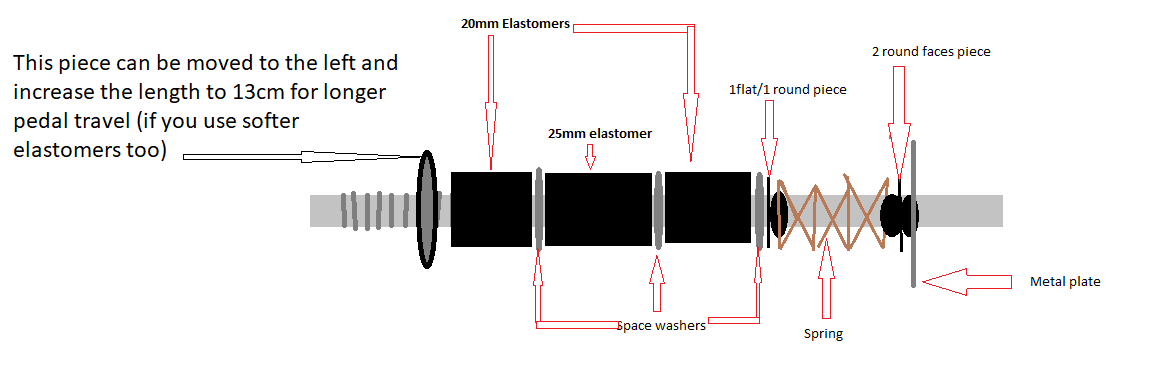
First, for clarification, will explain the dimensions of the brake springs + elastomers that comes with the SJP.
The metal bar has a diameter of 10mm. Minis got 8 mm metal bar. Probably Ruito/Simsonn/etc has 8-10mm too.
-
2 black elastomers 60HA (confirmed by SimJack, althought I feel they are actually softer): 10mm inner diameter / 25mm outer diameter / 20mm height.
-
1 black elastomer 60HA (identical to aboves but a bit taller): 10mm inner diameter / 25mm outer diameter / 25mm height.
-
1 spring: 34 mm height, 20mm outer diameter, 15mm inner diameter.
-
3 M10 washers.
-
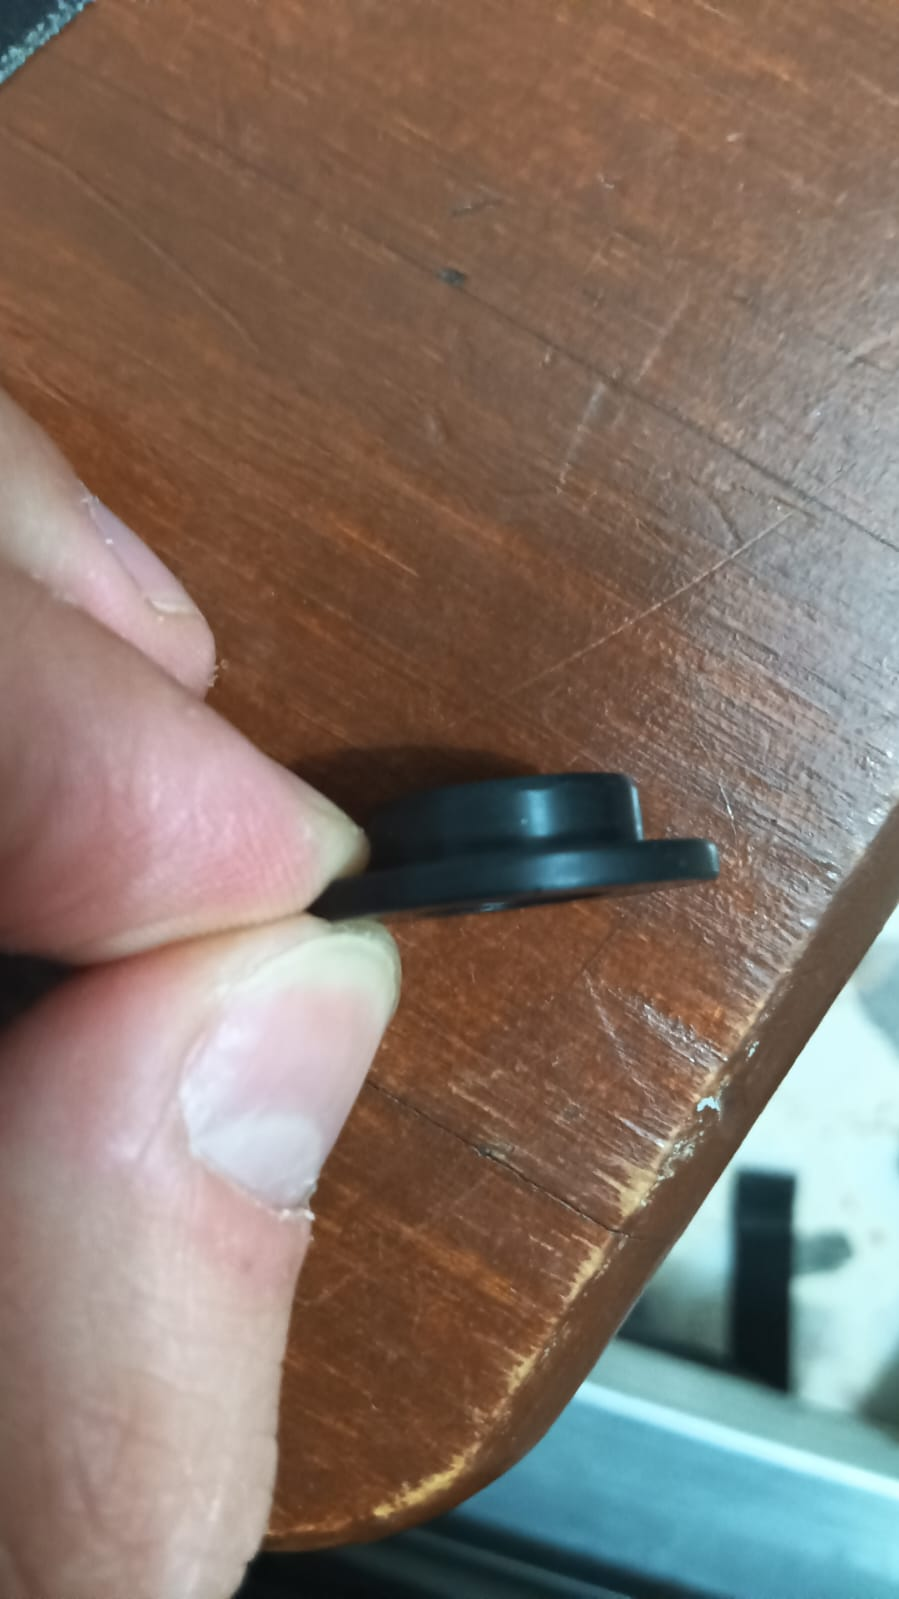
1 piece of plastic with 1 flat face and 1 round face. Goes between spring’s upper face and a metal washer. From now on, I’m calling this ‘1FF’.
-
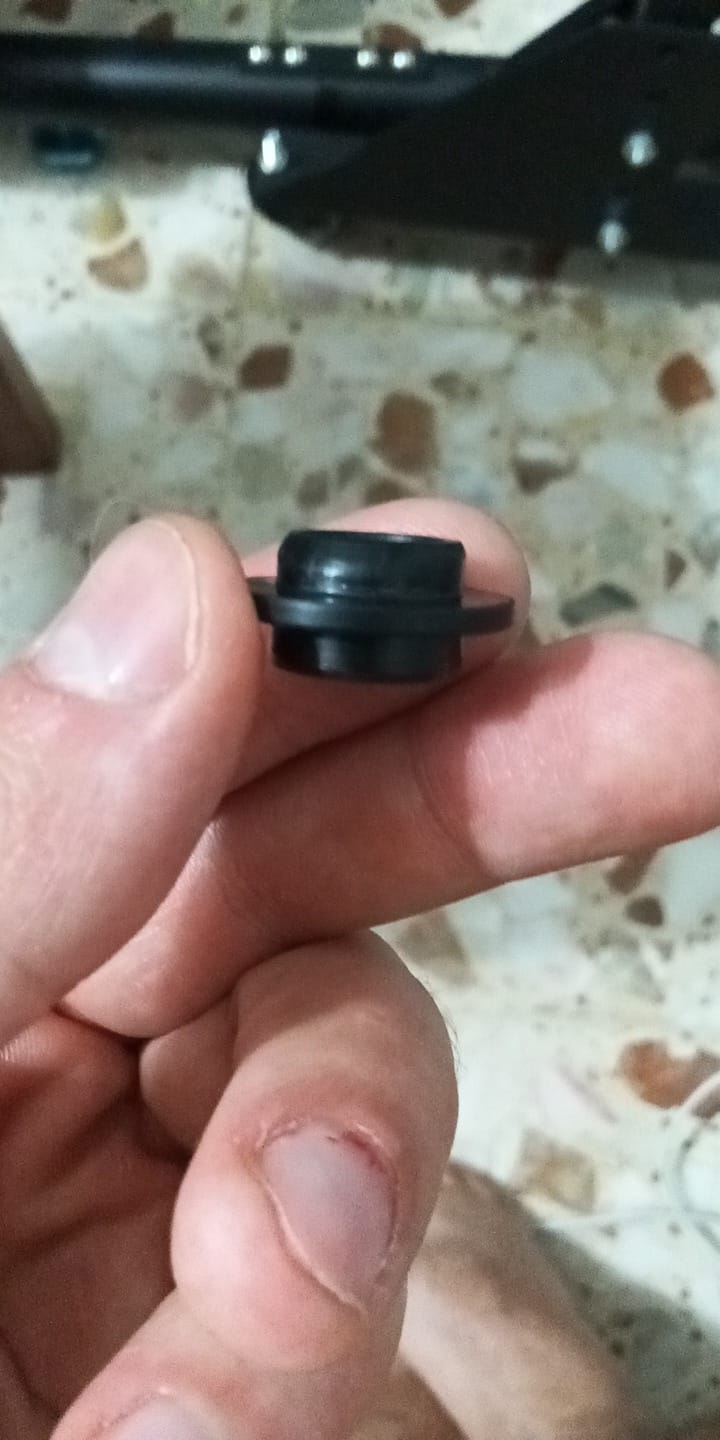
1 piece of plastic with 2 round faces that goes between the spring and the metal plate at the end of the brake. One face goes inside the metal plate; the other face goes inside the Spring. This face has 12mm diameter (will be important later). From now on, this will be ‘2RF’.
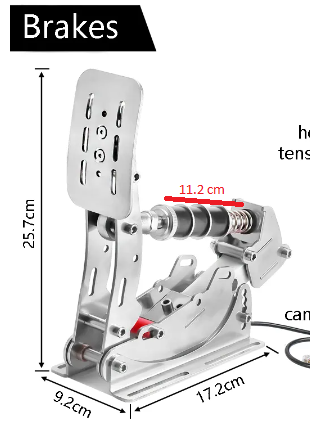
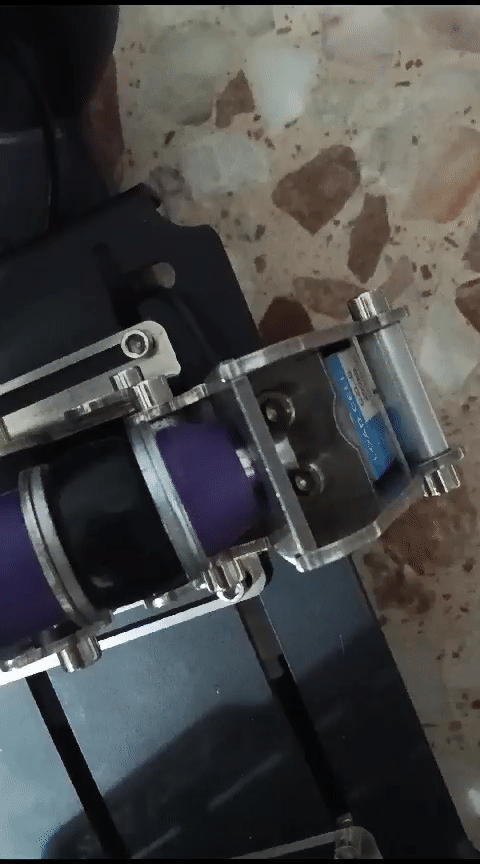
All this mounted as this image has a total length of 11.2cm (MARKED IN RED). If you untight this piece (I don’t know how is that called), you can get up to 13cm of length.
Quick Paint so you can see how everything is mounted. Today I’m feeling creative.
I think these are all the dimensions you need to know if you don’t have SJP pedals, so you can compare with your own set of pedals and find a solution that might work for you.
FIRST MOD:
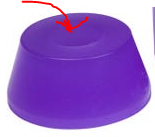
This first idea is pretty cheap, you only need the 2 smaller elastomers that comes with SJP, a few extra M10 washers and a set of skate bushings. Personally, I’ve used these bushings:
You can find them on several websites. Cost between 5-10€ depending where you find them.
The bushings are 72HA and M8 diameter. SJP needs 10mm but they fit if you make some strength, and they have a good resistance, so they won’t break.
HOW YOU MOUNT THIS FIRST MOD? --> Conical bushing +2 Washers + Black elastomer + 2W + Flat Bushing + 2W + Flat Bushing + 2W + Black Elastomer + Conical bushing + Metal plate at the end.
Both conical bushings’ flat faces must look to the center. Why? I don’t know, they look cooler like this. If someone thinks there are good reasons to change this, write me a comment :)
Okay, this is quite simple. You don’t need to do much and requires 0 effort.
You can change order to your likings; you can remove 1 purple flat bushing and add the other black elastomer if you want it softer; you can add/remove washers to your likings.
- Pros:
- Almost perfect resistance and travel FOR ME. Would like if the black elastomers were a bit harder but could perfectly get used to the feeling.
- Cons:
-
Black elastomer feels like will brake in few months (they seem to suffer quite a bit when you hard brake).
-
Bushings being 8mm makes a bit hard to remove them from the metal bar if required. They are so tightened that I think they give some extra resistance, specially when trying to change the mod.
-
Without 2RF piece, when you start pressing the brake, it has some play that for me was annoying. Again, I could get used to this if required, you can use that little early travel without resistance to rest your foot.
2ND MOD:
Not really different from the first one. You need the same bushings and elastomers. But this time we are drilling the bushings. I STRONGLY RECOMMEND TO TRY THE FIRST MOD BEFORE THIS ONE, you might be ok with how the first mod feels, and you can fuck up your bushings by a poor drill.
Why would we drill the bushings?
-
First, to be able to use 2RF piece and remove that play when pressing brake.
-
Second, because I tried looking for bigger diameter bushings and couldn’t find them. I guess it is just a standard.
-
Third, to make the brake resistance a bit softer, and also to make easier to remove the bushings (OPTIONAL).
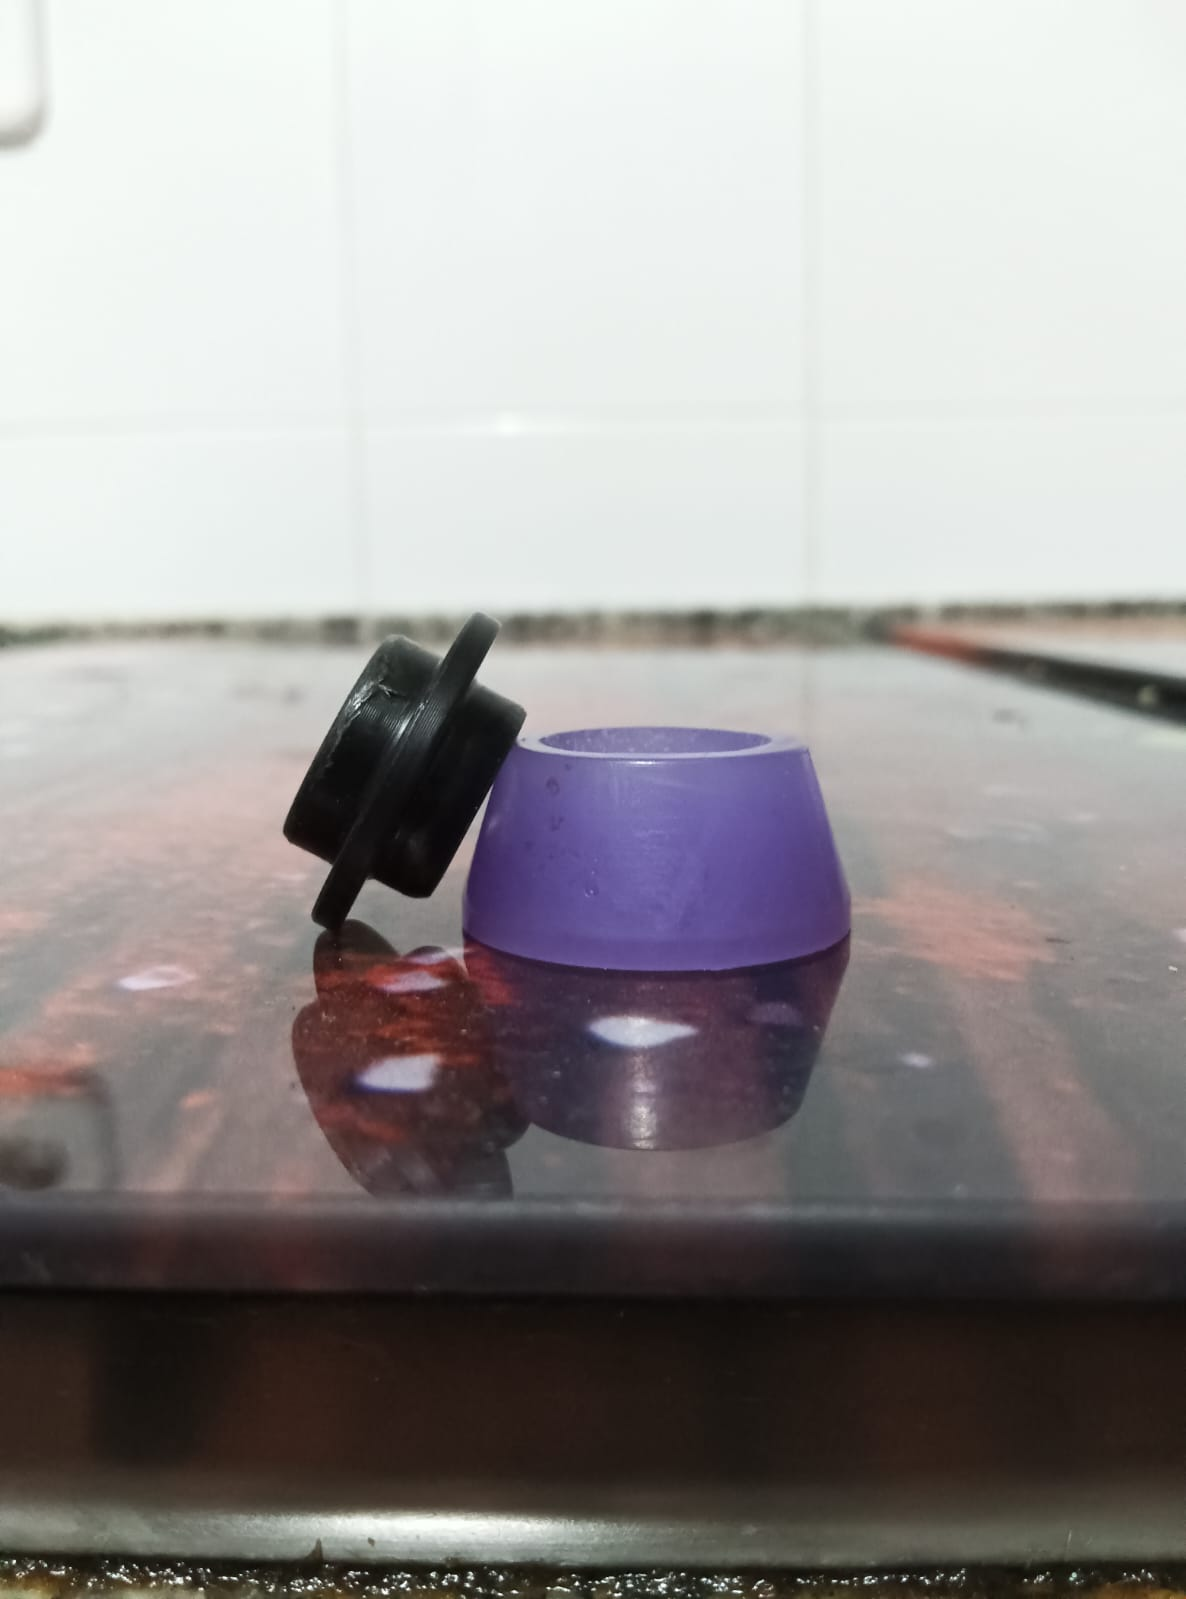
Ok, so this is quite simple, take a M12 drill and open 1 conical bushing’s narrow side. Have some patience and do it slowly, don’t rush it as you can brake the bushing.
The objective here is to be able to introduce the 2RF piece there ( in this picture I already had opened the diameter). You don’t need to open the circle to a perfect 12MM. I actually opened mine less, and made some force to introduce 2RF in there. Also, YOU DON’T NEED TO OPEN THE WHOLE INNER CIRCLE, just the first half to be able to introduce the 2RF circle inside (quick sketch).
Result after drilling.
Ok so now you mount this as before, but now you can use the 2RF piece and you avoid the little play we talked about.
OPTIONAL: Let’s drill all the bushings to M10. Why? easier to remove the bushings, less resistance to movement, and a bit softer pedal brake as the support surface is reduced.
Again, have patience, it took me almost half an hour to drill everything. If you do it too fast without stopping, you might overheat and deform the bushings.
For the conical bushing we already drilled to M12, just drill the other half to M10.
- Pros:
-
No more play.
-
Easy to do.
- Cons:
- I drilled everything to M10 + 1 conical face to M12. Now brake is softer than before, and I prefer stiffer pedals. Althought the bushings are really resistant, after this modification they will wear faster as it is now weaker.
If I knew before, I would have only drilled the M12 bushing and keep the rest as M8, it would have done a better result for me as I would have a stiff pedal.
3RD MOD:
Again, not really a mod. Just some modifications. But now you know how this work and what you might need to find what you look.
- Need an even stiffer pedal? Try to add some M10 Rubber Spacers, and try removing 1 black elastomer, or 1 bushing, etc… The only M10 Rubber Spacers I found are these:
They are 85HA so they are really stiff, try adding the little ones and increase hardness little by little. If you find something cool, comment it please :)
-
Do you like the feeling of springs, but don’t like the one that comes with SJP? Go to Aliexpress and find a spring you like. You just need to know that inner diameter must be 15mm (16mm might also work). Outer diameter doesn’t really matter I THINK (correct me if i’m wrong), but I would go for the closer to 20mm. Look for the desired height for more/less travel and find a resistance that you like.
-
Look for alternative 3D printed elastomers. They need to be 10mm inner, or if you don’t want the bushings, get one that ends with 12mm diameter so you can use 2RF (I really think this piece is a must as it avoids the play).
4TH MOD:
I’ve ordered some custom-made elastomers from an online shop that makes elastomers for different pedals brands. They should arrive in about 2 weeks.
Will try different alternatives: full M10 elastomer with different hardness (no 2RF piece at the end), M10 + M12 at the end to use 2RF…
Will update the post when I try them.
If you have any other idea, please comment it down and I will try it and upate the post :)
If you have any question, ask me!
You must log in or register to comment.